Showing posts with label Maya Tutorials. Show all posts

Monday, 30 May 2011

Maya Tasks Final Weeks - End of Year 2

Here are the last of all Maya tasks for this year.

Dynamics - Week 2

Softbody - Flesh

In this example the skin around the chin has been made a softbody. A softbody controls mesh with a particle for every vertex. The particles around the chin have been weighted so that they are attracted to a copy of the original mesh shape. By making it, for example, half weighted, the flesh around the chin wobbles. We have control over a few other attributes to fine tune the effect.

Softbody - Cloth

The cloth has been made a softbody. The ball collides with a dummy plane just underneath the cloth plane. the particles in the cloth collide with the ball. The particles conserve is set to zero to leave an imprint.

Softblody - Snow

The snow plane has been made soft. This is similar to the last example. The particles have been made to collide with the shoe. With the conserve attribute set to zero, the particles stop moving after the release of the shoe.

Softbody - Water

Here a water plane has been made a softbody. This has been made to ripple like water with the use of springs make the motion of the ripple travel.

Softbody - Bubbles

Here the bubbles are begin deformed by their own individual lattice deformers. The lattice deformers are softbodies that are being affected by dynamic fields.

Here is a video showing the above effects.


Dynamics - Week 3 to 4

For The last two weeks we looked at the nDynamics System in Maya. nDynamics divides into two parts. nCloth - for cloth simulations. nParticles - for advanced particle simulations. The beauty of this system is that the particles and cloth work together, so particles can have an effect of the cloth as much as the cloth can have an effect on the particles. The particle system is even more advanced than the standard particle system in Maya, as it has additional features.

The first task was a introduction to cloth with a pretty standard set of flags blowing in the wind.
The flags were made cloth objects and the wind atributes in the system node (nucleus) were set accordingly.


The second example show how we can cache two simulations and blend between the two. In the first cache the bouncy castle was set to be deflated. Then in the second, to be fully inflated.


This example shows how a simple piece of cloth can be used to influence a more complicated piece of mesh. The netting (made up of cylinders with lots of polygons) is influenced (by wrap deformer) to a flat piece of cloth (hidden). Some nParticles were added into the scene for the netting to collide with.


This next example was particularly complicated. A combination of techniques was used here to achieve a dynamic rope bridge. two plat planes were used (one above the other) representing the lower and upper ropes. The ropes and planks are influenced by the cloth planes. The vertical ropes are constrained by both ends of the horizontal ropes. The cloth planes are held at both ends by transform constraints.


Here is a video of the above effects.

Yeah, I went a little further and experimented at destroying the rope bridge. It worked surprisingly well.


Now for the last three examples.
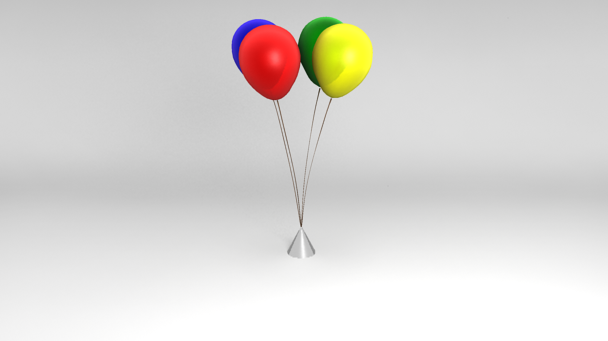
The first demonstrates how you can use cloth to simulate other objects such as balloons. The string has its own settings as does the balloons. They are constrained together at the join with a component to component constraint.


This example demonstrates a very powerful aspect of the cloth simulation. You can make tear-able surfaces. We can control the exact time in which the cloth tears by animating the glue strength on the cloth.


A similar thing can been seen here as the bag splits apart. nParticles have been filled inside the bag and have an M&M instanced to it.


Here is a video of the above effects.


Match Moving - Week 2 to 4

Week 2 Automatic tracking

This example shows what automatic tracking can achieve. The spheres are added in to test how they match in the shot.


The software detects where the camera is moving and reconstructs it by following points of high contrast (in theory). The downside to this is that it can't distinguish between static objects and moving objects so anything that moves has to be masked out to avoid the software getting confused.

Target Tracking

In this example I have manually picked the points for the software to track. I've picked several points from varying distances to the camera so that the software has enough information to calculate the approximate perspective and movement.


Masked auto Track

This example shows how masking the tracking area can localise the automatic tracking calculations. This has been done in reverse so instead of the tracker calculating the camera movement, it is tracking the movement of the car.


And so this car has now been turned into a wind up toy car!


High Res Body Modeling - everything for this year

The head


The Body


So next year we will be finishing it, with the feet, arms and hands. There may be one or two areas that need a little clean up or more detail, but it's at a good stage so far.

For any previous tasks view the Maya Tutorials link to the left of the page.

A Flock of Pixels

Monday, 9 May 2011

Maya Tasks Week 26 - Dynamics and Match Moving

Dynamics - Rigid Bodies

To begin the next set of tutorials we are now looking at rigid body dynamics.
In this first example I've created a chain, that swings down with the force of gravity. The chain links collide with each other as solid objects to create the swinging chain. Stand-in objects of lower density of polygons were used in the simulation an higher quality chains were used for rendering.


This next example is of an earring that swings much like the chain, except that the objects are attached to each other via Pin constraints instead, because they don't collide in the same way.


The next example is of a catapult throwing a rock at a brick wall. This one was slightly more complex to setup, but was quite fun to watch in simulate.
First the ground plane was set to be a rigid object that isn't moved by dynamics. (Passive Rigid Body) Then the bricks, catapult and rock were set to be dynamic objects. (Active Rigid Body)
To propel the catapult, a spring constraint was used. Dynamics done the rest.


Lastly is the Cradle. The idea is the end metal balls are supposed to bounce off the pack. This seemed to require more luck than anything else, but basically the balls are Active Rigid Bodies and are held up by a pair of Nail constraints. It was then a matter of tweaking with the properties of the balls and gravity field to get it to work. Even then it only managed a swing or two.


Here is a video of the examples above.


Match Moving - Still Camera

This is matching a filmed shot in 3D for the purpose of adding in CG elements.
Well not exactly match moving yet as the camera is still, but this is sometimes the scenario. That also means that you can't use software to calculate the 3D space in the image so in this example the camera had to be positioned manually with trial and error.

Anyway, I had to use what is in the scene as visual cues to work out approximately the 3D space. One of the first things to work it is the focal length. This can partially be figured out but how much objects shrink into the distance. First of all the camera had to be roughly positioned, then a few cubes were added to the scene a positioned where the buildings were. From then on it was a matter of tweaking the camera position, the focal length and the models until the whole set was mapped out in 3D space.

A few spheres were added into the scene to test how things fitted in and then an orrery was put on top of the bricks in the center.
Lastly the lighting was figured out (approximately) by looking at the shadows in the scene.


Next week we look at a moving shot.


Oh and here is the progress on the high res body modelling tutorial which I started during the holidays. Not finished yet, but getting there.


A Flock of Pixels

Saturday, 9 April 2011

Maya Tasks Week 24 - Dynamics and Mental Ray

In this weeks dynamic tutorials we continued with particles.

The first example is of mud sliding off a golf ball. The particle render type was set to blobby surface to make the particles a solid mesh that would deform over the ball. Various scripts were used to control the way the mud slid off the ball.


The second example uses particle sprites to create magical dust. A sprite is an image and in this case its an image of a bright star like glow.
Scripts control the look of the particles, from colour to size and rotation etc.
Then it was taken into after effects for further adjustments.


Mental Ray

Caustics

in this rather short tutorial we tapped into some caustics. Caustics are what cast bright hot spots when light refracts through materials such as glass or water.
This example shows how caustics has an effect in this scene.

No caustics


Caustics added


Notice the bright white glows mixed in with the shadow.


Mia Material X

The Mia Material X shader for Mental Ray is a very versatile shader. It can be made into almost any type of material. In this exercise we looked at all the preset materials. You can see that they can be made to look very realistic.

Before


After


HDR Image Lighting

In this exercise we looked into Image based lighting with HDR images.

-colour gain
-colour offset

With no image based lighting


Default image based lighting settings - 0,1
Looks like night time


With an offset on colour gain and colour offset by 1 - 1,2
A reasonably good looking render


With an offset on the colour gain and colour offset by another 1 - 2,3
Slightly blown out.


I found that keeping the settings within a range of 1 kept the colours neutral.
When just increasing the colour gain alone the image tinted blue! - 0,5


Tweaked settings - 1.3,2.3


Physical Sun and Sky with Portal lights

A default sun and sky set-up works great for outdoors, but not so with interiors, as seen in this render.


Not enough light seems to enter through the window of the room, so to fix this we use portal lights. A portal light focuses the light into entering the room.

This is how a portal light positioned just outside the window, helps improve the image.


I then experimented with some ambient occlusion.


Also in the occlusion settings is a colour bleed option.
Here is the final result.


The Physical Sun and sky


This exercise went through some of the more advanced features of the Physical sun and sky in Mental Ray.

Here we have an island scene with the default sun and sky.


First that was tweaked was the horizon line.


Then the sun position was changed by rotating the directional light that represents the sun.


The sun disc size can be changed to. In this case I made it slightly bigger.


Now the sun is changed back to early mid day, I shall go over a few of the other settings.


The haze attribute affects how much atmosphere is in the scene.
from left to right you can see how less haze is clear and adding more haze gives us something more overcast.


The Red / Blue Shift can be used to similar effect.
a range of -1 to 1 can be used in this channel.


The last key attribute is the Saturation.

Most of the effect changes can be seen in the sky and in the reflections of the sky.


Shadows can be tweaked also. This is the default.


After increasing the softness grain starts to notice more.


So increasing the samples helps remove it.


Last but not least, I have finally gotten round to finishing the weight lifting animation! I am quite pleased with how its come out, considering only a day was spent on it. Usually for something like this I would spend at least two days.
The video starts with the keys in stepped mode and then the final animation.


I think if I had that extra day I could have spent more time in the curves editor, fixing all of the overshot curves etc. Most of what you see was done without going into curves editor at all except for fixing a rotational glitch in the wrists.

I think that should be all the Maya tasks done for this project.

A Flock of Pixels